Tag: container gardening

Best Grow Lights for Small Spaces in 2021

Best Grow Lights for Small Spaces in 2021

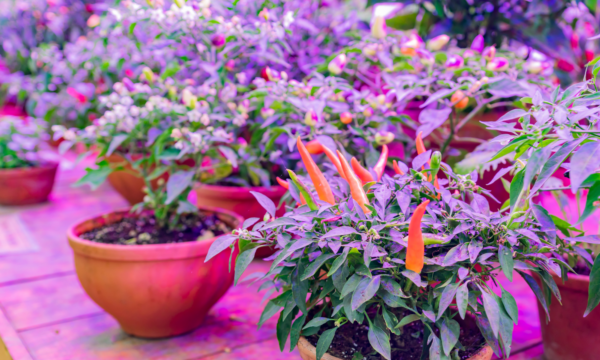
Grow lights are great for spaces with limited natural light. If you are planting in a space with limited windows, or even an outdoor patio garden that is mostly shaded, you can help supplement your plant’s natural light with grow lights for a few hours…

The Best Soil for Container Garden Tomatoes

The Best Soil for Container Garden Tomatoes

Container garden tomatoes can be tricky to master, but they’re definitely doable, even for beginners! There are several things you want to consider when selecting the soil to grow your container garden tomatoes in. Tomatoes can grow in a wide variety of soils. However, if…

How to Care for a Marimo Moss Ball

How to Care for a Marimo Moss Ball

Marimo moss balls are a trend that is sweeping the plant industry. Marimo is a Japanese word that translates to “seaweed ball”. These plants have been increasing in popularity due to its easy, low maintenance care, and the fun of adding a new type of indoor plant to your collection!

For those new to plants, or those looking to add a unique and fun new pet to their apartment, we love the idea of adding a marimo moss ball to your collection!

Where to Buy a Marimo Moss Ball?

Lets talk about where you can buy a Marimo moss ball.

You can buy these moss balls from a number of places. You can find them on Etsy, places like The Sill, Amazon, or other online plant e-com sites. We personally think Etsy is a good option for purchasing a moss ball.

This Etsy seller is one of the most popular vendors for Marimo Moss balls online.

photo credit to EastWestSpiritCo

You can also purchase marimo moss balls from your local pet store. Often chains like Petco have marimo moss balls. The advantage of buying in person allows you to pick the healthiest looking moss ball of the bunch!

Important note – There is some controversy about purchasing moss balls online, so before you purchase one check out the company that is selling it to ensure they’re providing high quality plants.

You’ll likely notice websites will caution against buying Marimo moss balls online, as they believe that its possible to get a fake moss ball or one that is unhealthy. While it is important to do your research, we have not experienced this with the Etsy provider linked above. They also have many positive reviews to support this!

Marimo Moss Ball Care

First, lets take a look at some basics for caring for your Marimo moss ball.

Where Can They Live?

Marimo moss balls can live in a wide variety of tanks and containers. They don’t need a lot of space, but do have to be submerged in water. If you have fish tank they can be kept in the same tank as the fish – in fact, moss balls help keep an aquarium clean!

However, if you don’t have fish already, fear not. These plants will thrive in small jars or terrariums as well. The main thing they need is water, and after that they can essentially take care of themselves.

Creating your moss ball’s home is one of the most fun parts of getting your new pet. We love the idea of a fun jar for your moss ball to add to your décor. This jar is super fun and would work for a couple moss balls at a time.

And don’t worry – moss balls will be totally fine in an enclosed jar. With or without a lid – moss balls will thrive just the same.

How much light should you give them?

Marimo moss balls thrive in indirect low or medium light. If placed in direct sunlight, they risk getting burned from the suns rays. The best option is to place your new pet in a room that is indirectly lit, and never exposed to direct sunlight coming through a window.

Temperature is also a factor here. With your moss ball most likely being kept in a clear glass container the suns rays are likely to warm the water up which can also be harmful to your new pet. To be safe its best to keep your moss ball out of direct sunlight.

Do they need food?

Nope! In keeping with their low-maintenance persona, these pets don’t need any additional food. Just like normal plants they use photosynthesis to produce all the nutrients they need. They’re happy to exist in water and create their own nutrients without any additional help from you.

How fast will they grow?

Marimo moss balls grow very slowly. In fact, when you purchase your moss ball you’re likely getting one that is already a few years old. They can grow up to 5mm per year, but often grow less. However they live for a very long time, so if you purchase one that is already aged you can get a larger than average moss ball.

When keeping a moss ball in a aquarium or jar, your moss ball is not likely to exceed 10 inches in diameter no matter how old it is, and most will be much smaller than that.

Should I change the water?

Yes! We recommend changing the water every 1-2 weeks. Tap water is fine, no need to go over the top with anything fancy. If you’re using a tank with fish in it keep to your normal routine for water.

While changing the water, we recommend giving your moss ball a massage!

To do this, simply remove it from the water, gently squeeze the excess water off, and then roll back and forth between your palms while running under fresh water (again tap water here is fine). Don’t press too firmly, the goal is to keep your moss ball in a round shape while doing this without exerting too much pressure.

How long will my moss ball live?

With proper care, moss balls can live up to 200 years! Often when you buy a moss ball you’re buying one that is already 10-15 years old. These plants are one of the most unique and interesting plants. They make great housewarming gifts too. In fact, in Japan they’re seen as a sign of good luck!

Do you have a moss ball? Tell us your top tips in the comments below!

Best Hydroponic Grow Systems for Beginners in 2021

Best Hydroponic Grow Systems for Beginners in 2021

Want to learn how to grow produce year round from your apartment counter top? Hydroponic systems are creating a lot of buzz in the gardening industry, and there’s a ton of options for those looking to get started. Today, we’re covering some of the basics…

7 Renter Friendly Ways to Decorate Your Patio Garden

7 Renter Friendly Ways to Decorate Your Patio Garden

Its no secret we love a good patio garden, or balcony garden. Spaces like these allow you to grow fruits and vegetables in a space that you can also enjoy and gather in (or enjoy alone time). There are many ways you can decorate your…

3 Easy Steps to Grow Sprouts in a Mason Jar

3 Easy Steps to Grow Sprouts in a Mason Jar

Sprouts are one of the easiest items to grow and have a super short harvest timeline, making them excellent for beginners! They’re packed full of nutrients too and can be used in a variety of ways, such as salad toppings, sandwich ingredients, etc.

Keep reading for our beginner friendly step by step guide on how to grow your sprouts in a jar.

Getting the Right Set Up

In this article we’re largely covering a DIY method. By this, we mean we’re going over how to grow sprouts with items you likely already have in your kitchen.

If, by chance you do not have these items or you want a quick, simple set up to purchase, you can purchase a sprout growing kit instead.

These kits are fairly affordable and usually under $30. We love this one from Amazon if you’re looking for a one stop shop for setting up your sprout growing system.

DIY Method – What you’ll need

Step 1: Place Sprout Seeds in a Jar & Cover with Water

Start by placing your sprout seeds in your jar. We recommend putting 1-2 tablespoons of sprout seeds to start, but you can always adjust according to your needs once you know how many sprouts you want.

After you’ve placed the seeds in the jar, cover with 2 inches of warm water. Let sit overnight.

Step 2: Drain Sprouts & Rinse

The next day, you’ll place either the cheesecloth or fine mesh screen over top of your jar. Secure either with rubber band, or if you’re using a jar with a canning lid, screw the top of your lid onto the jar without the middle section to secure.

Alternatively, you can also purchase sprouting jar lids to avoid the hassle of the DIY method.

From here, dump out old water, add new water to the jar and swish around to ensure all seeds are rinsed. Drain water out of jar.

Step 3: Repeat!

From here, you’ll repeat this process until sprouts begin to grow. Depending on the variety you chose, this process could take 3-7 days. We recommend rinsing and draining 2-4 times per day to ensure sprouts are fresh.

Sprouts are best harvested right as they turn green. To store, we recommend keeping them in a covered container with a paper towel to absorb the excess moisture. Sprouts are best eaten within the week after they’re ready.

How do you use sprouts in your meals? We’d love to know! Let us know in the comments below!

Looking for more ways to grow your own food? Microgreens are another great option to quickly grow food at home. Check out our recent post on how to grow and harvest microgreens at home for more info!

Uses for your Sprouts

There’s a wide variety of uses for sprouts and ways to incorporate them into your diet. Sprouts are full of vitamins and nutrients, similar to vegetables but in an even more condensed form than a lot of vegetable varieties.

Some easy ways to use your sprouts include using them as sandwich toppings, garnishes on soups, salad toppings, etc. You could also always eat them plain, which is one of our personal favorites! You can also add them to smoothies for some added nutrition.

Best Sprout Mixes

If you’re just starting out sprouting, you may not be sure what mix is best.

There are many varieties to pick from and the range of options might be slightly overwhelming.

Each person will have their own personal taste, so we recommend trying a sampler pack before purchasing a large quantity of sprouts of any one specific type. This will give you the chance to try a bunch of flavors and figure out what you like best.

This seed mix pack from the Sprout House is one of our favorites, and what we’d recommend to newbies to get started.

Other Tips

Growing sprouts in a jar is fairly simple and straight forward. The main caution for first time growers is to be sure to continuously rinse the seeds and ensure you do so thoroughly. This is to prevent your sprouts from molding, which would make them inedible. Other than that your sprouts should be fairly resilient. They can grow with varying levels of light, so feel free to keep them wherever is convenient for you.

The Pros and Cons of Using Grow Bags for Gardening

The Pros and Cons of Using Grow Bags for Gardening

Using grow bags is a method of container gardening that is not as well known, especially to beginner gardeners. There are several benefits to using grow bags though, and we think its worth considering when planning a container garden. In this article we’re going to…